How to Adjust a Bike Saddle
Are you tired of uncomfortable rides and nagging pains after cycling? It’s time to take a closer look at your bike saddle.
A saddle plays a crucial role in your cycling experience, affecting comfort and efficiency. Adjusting it to the perfect position can make a world of difference.
In this guide, we will walk you through the step-by-step process. Read on so you can achieve the ultimate combination of comfort and performance!
Importance of a Properly Adjusted Saddle
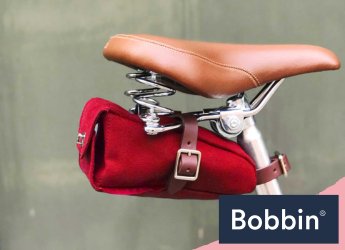
(Sprung Saddle)
An ill-fitting saddle can quickly turn a pleasant ride into a painful ordeal. When not properly adjusted, it can lead to discomfort, pain, and decreased performance. The position of the saddle has a significant impact on various aspects of cycling.
First, saddle position affects posture. A saddle that is too high or too low can cause riders to adopt unnatural positions. This can strain the back, hips, and neck, resulting in discomfort and even chronic pain.
Second, the saddle position affects balance. An improperly positioned saddle can throw off the rider’s balance. It makes it harder to maintain stability and control on the bike. This can be especially problematic when navigating challenging terrains or executing quick manoeuvres.
Lastly, the saddle position affects power transfer. The right saddle height, angle, and fore-aft position ensure optimal power transfer from the legs to the pedals. This helps maximise efficiency and speed. When the saddle is poorly positioned, energy is wasted.
To avoid these issues, adjust the saddle and ensure it suits your body and riding style.
The Necessary Tools
Before you begin adjusting your bike saddle, gather the needed tools. Here’s what you’ll need:
1. Tools
- Allen wrench: Different saddle clamps may require different sizes.
- Measuring tape: Useful for measuring saddle height and fore-aft position.
2. Level surface and bike stand

Find a level surface to work on, ensuring stability during the adjustment. If you have access to a bike stand, it can greatly simplify the process by holding your bike steady.
3. Appropriate cycling clothing
Wearing appropriate cycling clothing can help you gauge saddle comfort accurately. When adjusting the saddle, wear your cycling, for instance. This helps take your clothing’s padding and fit into account.
Determining the Correct Saddle Height
A general rule of thumb is to set the saddle height based on leg extension during the pedal stroke. To measure and adjust saddle height, follow these steps:
- Stand next to your bike and place your heel on the pedal at its lowest point.
- Adjust the saddle height so your leg is fully extended without locking the knee.
- When you switch to the ball of your foot on the pedal, there should be a slight bend in your knee. Ideally, approximately 25-35 degrees.
Individual preferences and riding styles may vary. Thus, it’s important to consider factors like personal comfort and performance goals. Some riders prefer a slightly higher saddle for more power and efficient pedalling. Meanwhile, others prioritise comfort and opt for a slightly lower position.
Remember, the slight knee bend at the bottom of the pedal stroke is essential. This ensures proper leg extension and helps avoid strain or injury. A saddle that is too high can lead to overextension. In contrast, a saddle set too low can result in inefficient pedalling.
Take your time to fine-tune the saddle height to achieve the ideal saddle position.
Finding the Optimal Saddle Angle

A properly adjusted saddle angle ensures weight distribution. It minimises pressure points and allows for optimal pedalling mechanics.
A level saddle refers to a saddle that is parallel to the ground. Achieving a level saddle can be done using a traditional level tool. Alternatively, a smartphone app equipped with a levelling feature. By placing the level on top of the saddle, you can easily adjust its angle until it is parallel to the ground.
When adjusting the saddle angle, personal preference and riding style come into play. Some riders prefer a slightly upward or downward tilt for comfort and to suit their riding style.
Generally, start with a level saddle. Make small adjustments based on your comfort and performance needs. Experiment with minor angle changes to find the sweet spot that provides comfort and efficiency during your rides.
Adjusting the Fore-Aft Position
The fore aft position is crucial for proper knee alignment and efficient power transfer. To find the optimal fore-aft position, you can visually align your knee with the pedal spindle. Sit on the bike with your feet parallel to the ground and the pedals level.
Check if your forward knee aligns directly above the centre of the pedal spindle. If it does, your saddle is likely in a good position. If not, make adjustments accordingly.
Fine-tuning the fore-aft position is important for individual comfort and riding goals. Here are some tips:
- If you experience discomfort in the front of your knee, move the saddle slightly backward. If you feel the strain at the back of your knee, adjust it forward.
- Riders seeking more power might prefer a slightly forward position. This adjustment allows for an increased engagement of the quadriceps. Those prioritising endurance and comfort may benefit from a slightly backward position.
Remember, small adjustments can make a noticeable difference.
Round-up
Adjusting a bike saddle is a crucial step towards achieving comfort in a cycling journey. By ensuring the correct saddle height, angle, and fore-aft position, you can avoid:
- discomfort
- pain
- decreased performance
Remember the general rule of thumb for saddle height. Plus, the importance of a slight knee bend at the bottom of the pedal stroke.
Keep your saddle level for optimal comfort and power transfer. Fine-tune the fore-aft position based on your individual preferences and riding style. With these adjustments, you’ll unlock the true potential of your bike saddle!


