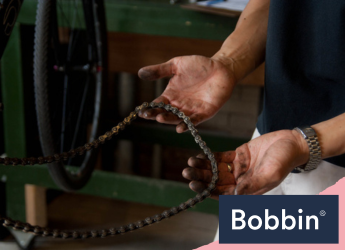
How to Fix a Bike Chain Without Tools
We’ve all been there - you’re out on a ride, enjoying the open road, and suddenly, your bike chain link decides to act up. It’s frustrating, inconvenient, and can put a damper on your cycling experience.
But fear not! In this guide, we’re going to show you how to tackle this common issue without the need for any fancy tools. So, let’s roll up our sleeves and get those chains back on track!
Understanding Common Bike Chain Issues

Bike chain problems can be a real headache during a ride — and it’s common for both kids' bikes and adults' bikes. Imagine a chain that stubbornly refuses to shift, leaving you stuck in the wrong gear on a steep incline. Or one that suddenly falls off, forcing you to stop and struggle with repairs. These inconveniences can quickly turn a joyful ride into a frustrating experience.
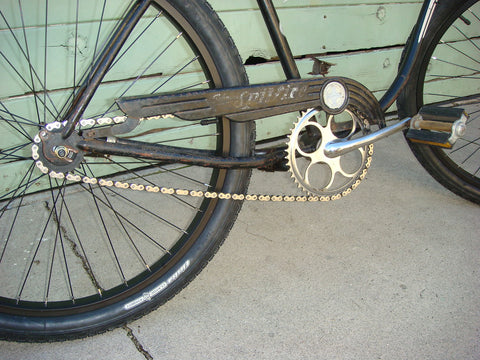
The anatomy of a bike chain

To effectively fix this dilemma, it’s crucial to grasp the fundamental components of a bike chain. This includes the following:
- links which connect the chain
- pins that hold these links in place
- rollers that allow the chain to move across the gears smoothly
Understanding how these elements work together is essential for resolving chain issues. And the good thing is that you can address this matter without the need for a bike toolkit.
Fixing a Fallen Bike Chain

Step 1
When you encounter a chain issue on your commuter bike, stop pedalling and pull over to a safe spot. This prevents any further damage and ensures your safety.
Step 2
Carefully remove the chain from the front chainring. Gently lift it off, being mindful of any grease on your hands.
Step 3
With the chain in hand, guide it back onto the front chain. Ensure it fits snugly into place, and check for proper alignment with the teeth of the chainring.
Step 4
Re-engage the chain with the rear derailleur. Start by pedalling slowly and shifting gears. This should allow the chain to slip back into its intended position.
Tips
- Steer clear of getting fingers greasy.
- Double-check the chain’s tension after reattaching.
- Keep an eye on your bike’s performance during the next few minutes. Make sure everything runs smoothly.
With these steps, you can get your or your child’s Bobbin Gingersnap bike chain back on track without any tools!
Fixing a Chain That Won’t Shift
By following these steps, you can address a chain that refuses to shift smoothly:
Step 1
Begin by shifting to a lower gear on the rear cassette. This alleviates tension on the chain, making it easier to manipulate.
Step 2
Pedal gently while shifting, coaxing the chain into the desired position. The motion helps guide the chain onto the correct gear.
Step 3
Ensure the front derailleur is properly aligned with the chain. Misalignment can cause shifting issues. Make any necessary adjustments to bring it into the correct position.
Round-up
Mastering the art of fixing a bike chain without tools is a valuable skill and a game-changer. Whether it has fallen off or refuses to shift, these simple solutions will keep you on the road and in control. So, next time you encounter a chain hiccup, don’t fret. Remember these techniques, stay prepared, and enjoy the ride to the fullest. Happy cycling!
Top tip: Carrying spare bike parts and tools on your journey is always wise. Store them in a pannier bag or bike basket conveniently.
Next on your reading list: Cycling Safety: What to Do if You Have a Cycling CrashRelated Posts

Is there a Difference Between Men's and Women's Bikes?
As bike designers, we often see customers get tripped up by the lab...

How to Wheelie on a Bicycle - A Guide for Kids
Wheelies are fun, but they’re also harder than they look—and that’s...

Easy Bike Tricks That Your Kids Can Try Safely
This isn’t a list of wild stunts, but a set of easy bike tricks for...