How To Teach a Child To Ride a Bike (In 4 Steps)
We all remember our first bike ride. The excitement, the freedom, and maybe a bit of fear. Before long, you were cycling through cobbled streets or escaping to the countryside. Now, it might be time to share that childhood experience with your little ones.
Here’s a simple guide to help you teach your child how to ride their kid’s bike in just four ways. Let’s get started.
For Balance Bikes
Balance bikes are a lot like traditional bikes but without the pedals. Instead, kids use their feet to push along the ground, which helps them learn to balance and steer all on their own, before eventually progressing to a pedal bike.
Here are four simple steps to teach your child how to ride one:
Standing
This stage can feel the most daunting and often takes the longest, but that’s pretty normal. First, your child should stand over the balance bike and get used to it. Let them walk it forward a few steps at a time so they can feel how it moves.
The goal here is simple: help them get comfortable with the bike.
Sitting
Once they’ve had a few walks with their balance bike, have them sit on the saddle and push off with their feet, just like before. If they feel confident, let them ride around other kids to make it more fun and bring out the joy of cycling. But if they’re a bit shy, keeping it just the two of you for now might help them focus on getting the hang of it.
Running
At this stage, they’ll probably have one foot off the ground as they start to pick up speed, so it’s all about helping them get the hang of balancing.
Tip: Head to an open space with plenty of room for them to explore. Trust us, they’ll love the feeling of zooming off, and you might find yourself jogging to keep up.
Gliding
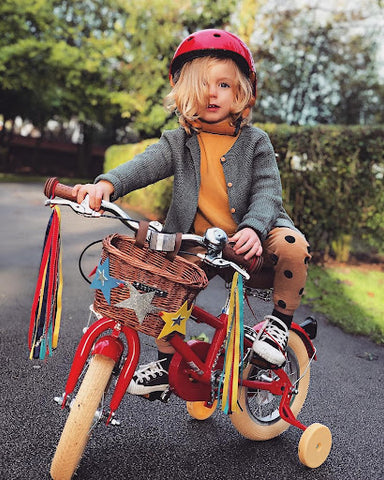
Now comes the exciting part—their first real taste of freedom! Encourage them to explore different types of terrain and try new skills like going uphill, downhill, and steering around corners.
Your job? Stick close by in case of any wobbles or tumbles, and enjoy watching them on this brilliant new adventure.

(Image Credit: Instagram/@ajemackie)
For Bikes with Stabilisers
A bike with stabilisers, like the Brownie Junior 16” Wheel, is a great next step after a balance bike—or if your child is keen to pedal but hasn’t quite got the hang of balancing yet. Training wheels help them get used to pedalling and balancing, though it might take a little time before they’re ready to ride without them.
Here’s how they can get started:
Look forward
It’s natural for children to want to look down to feel safe at first. We see this all the time with new riders. But it’s best to encourage them to look forward from the start. Not only does this help with balance, but it also keeps them clear of any bumps or crashes along the way.
Little and often
Everyone learns at their own pace, but it’s usually best to keep training sessions short, about 5 to 10 minutes at a time. Keep things fun and engaging, and they’ll be zooming along before you know it!
Practise pedalling
The great thing about stabilisers is that they take care of the balance for them. Start by having them place their foot on the pedal while you gently rotate it by hand so they can get used to the motion. Then, encourage them to try it on their own. This is a perfect chance to get them familiar with some of the more technical parts of cycling.
Master braking
Hold them on the bike as they pedal, then practice coming to a smooth, gradual stop. You can show them how squeezing the brakes gently slows them down and how a firmer squeeze brings them to a quicker stop.
Bikes Without Stabilisers
Without the extra support of training wheels, they’ll quickly pick up how to balance and steer themselves, which gives them more confidence on the bike. It also makes switching to a regular bike much easier, as they’re already used to balancing.
This is how they can begin:
Lower the saddle
Do this slightly. This helps with balance, as it lowers their centre of gravity, and will make them more comfortable in case they need an emergency stop.
Remove a pedal and try a one-pedal scoot
To help them feel more comfortable, remove one pedal. This gives them a chance to practise pedalling with one foot while scooting along with the other, just like they did on their balance bike. Once they’re confident with this, you can add the second pedal back on.
Make them feel comfortable
The easiest way to do this is to have them sit on the bike, both pedals attached and stationary. Have them hold the brakes and give the bike a little “wiggle” from side to side. This shows them the bike is steady, safe, and nothing to be frightened of.
Follow them
As they take their first few pedals, you can hold onto their clothes from either side. Once they start to gain confidence, let go for a few rotations so they can balance on their own, then catch them again. This will help build their confidence, and you’ll be able to let them ride on their own for longer each time.
It’s Cycling Time
You’ve done it! Just remember, every child learns at their own pace. The most important thing now is to let them enjoy this exciting new adventure—and, of course, look super cool on their Bobbin bike.
If you're wondering when the right time is for your little one to start cycling, check out our guide: When Can Kids Start Cycling?
Related Posts

Best Ways to Carry a Folding Bike
Folding bikes are designed to be lightweight and portable, and thei...

Adult Bike Without Gears - What Are the Options?
It’s a real bummer having so few options for bicycles for adults wi...

How to Teach Children to Ride Bikes on the Road
Is your child now more confident with pedalling and able to ride a ...