Bike Maintenance Ideas and Tips
Whether you bike regularly or just head out a few times a month, bicycle maintenance is a must. Regular upkeep can ensure you'll be safe and comfortable on the road.
Most importantly, it'll reserve the parts of your bike to last longer and be in good condition. Keep your two wheels rolling well for years with our bike maintenance ideas and tips!
1. Keep the bike clean
Your bike is prone to dirt build-up. Wash it up at least once a week or when necessary to remove the grease, mud and other debris.
This is a great practice to keep your bike looking pristine and running well. Lubricating the drivetrain also helps extend the lifespan of the chain and sprockets.
2. Do a tire inspection
Oh, don't you hate it when you have to stop and change a flat tire during your ride? This why you always need to inspect your tires and check their pressure.
A quality floor pump with a pressure gauge will do the work.
3. Check your brakes
Consistent checks are essential so make sure your brakes are adjusted correctly. Brake pads also wear down over time; change them if necessary.
Take a quick ride and pump your brakes. If the brakes are soft, your brake pads likely need replacement.
4. Keep the nuts and bolts tight
Keep all the screws, bolts and nuts in your bike tight, but don't over-tighten them. Keep things intact by simply checking for any loose bolts, screws, or nuts before you head out.
Avoid that rattling and banging sound all the way home!
5. Disc brakes check-up
Disc brakes offer more stopping power and work better in terrain and harsh weather. If your bike has one, avoid contaminating the rotor or pads.
Substances that can cause contamination are lubes and grease, and road grime, to name a few.
(Image Credit: Wikimedia Commons)
6. Ensure the rims aren't bent
A bend is a weak spot that can get worse if not mended. Sometimes the rim is visibly bent, especially if creases are on the sides.
But, for unnoticeable ones, you have to attempt to true the wheel and see if it lines up well.

7. Lube the derailleurs
Besides the pivot points, lube the barrel adjusters on the brakes and rear derailleur, as well. Include the brake quick-release mechanisms if your bike has them.
Apply a few drops of oil on both the front and rear to keep them moving smoothly.
8. Don't forget the steering
Lift your front wheel off the ground and turn it back and forth. It should turn with little to no push and move under its own weight.
Otherwise, chances are the headset is too tight and needs loosening or new bearings.
9. Headset adjustment
Put your bike on the ground, then pull the front brake and rock it forward. There should be no movement of the steerer tube relative to the frame.
If there's give in it, your headset is loose, which can affect your steering. Note: A steerer tube is where the stem connects to the fork.

10. Tighten the handlebar bolt
The bolts in the handlebars should be all tightened evenly and ideally using a torque wrench. If you don’t have a wrench tool, at least ensure they're snug but not overly tight.

(Image Credit: Wikimedia Commons)
11. Fit the seat post clamp bolt
Check the tightness of the seat clamp bolt. Like the handlebars, it should be tight but not overly rigid, especially for carbon posts.
A well-fitted post will slide smoothly into a greased seat tube with little effort.

12. Include the saddle bolts
Generally, there are two bolts underneath the saddle attached to the seat post. If they're slightly loose, your saddle will likely tilt when you hit a bump, so see to it that they're tight.
13. Inspect the skewer
Skewer rods sometimes stretch, but they can be fixed by adjusting and re-tightening them. When doing so, ensure both the front and the rear are tight. They should be firmly snug to achieve a rattle-free ride on bumpy roads.
14. Learn how to fix a flat
Fortunately, fixing a flat tire is easy. There are five basic steps: remove the wheel, then the tube, and find the cause of the flat. Then, patch or replace the tube, and reinstall the wheel.
15. Adjust if the bike is shifting poorly
If a new cable is installed, the rear derailleur shifting is likely to be slightly off. This is because the cable has been stretched.
To tighten it, turn the barrel adjuster counter-clockwise a quarter turn. Wait until the pulley wheel lines up exactly with the gear.
16. Do a frame inspection
Inspect the frame for cracks or serious dents, such as on the joints around the head tube and bottom bracket. If there are any cracks, even if it looks like it’s just paint, take the bike to an expert. There's likely a reason for it.
17. Keep an eye on the spokes
Check for loose spokes; start by grabbing two spokes part way between the hub and rim, then squeeze them. Both should flex about the same. Compare these to the others.
If any are looser than the rest, tighten them and make sure your wheel is straight.

18. Apply carbon paste
Use carbon paste wherever there's carbon rubbing against carbon or carbon against metal. Usually, this occurs where the handlebar attaches to the stem and the seat post.
19. Inspect the suspension
If you own a mountain bike, compress the shocks and then let them go. Check the shock sag by getting on your bike and see if the sag is about 25%. Here's how to check suspension sag.
If it's more than that (up to 30%), add some air with your shock pump; if it's less, let some air out. Your suspension will have exact recommendations for what psi you should be using.
20. Check the dropper post
If your post doesn’t spring back up quickly, you may need to fix your hydraulics and seals. Also, check the dropper post regularly.
21. Wrap the handlebar with tape
Handlebar tape provides a nice cushioning for your hands. It reduces the vibrations that travel from the road up into your arms.
See if your old tape has worn out, and replace it with a fresh roll of tape if necessary.
22. Consider taping the rim too
Protect your bike wheel's inner tube from spoke holes with rim tape. Faulty rim tapes also tend to cause recurring flats. It's something to look at when diagnosing the cause of flat tires.

(Image Credit: Wikimedia Commons)
23. Re-route internal cables
Internal cable routing helps create some of the cleanest-looking rigs. Plus, it protects cables from being snagged or severed in a crash. If you own a mountain bike, this guide comes in handy.
24. Set up cantilever brakes properly
Setting up cantilever brakes can be a headache; it will take a few tries but be patient. Make sure your brake cable comes down exactly in the yolk centre (the Y that connects to either break arm).
Use this guide to learn how to adjust your bike's brake levers.

25. Patch the inner tubes
Patching inner tubes is an easy way to save money when repairing your bike. There are different kinds of patch kits, but the most common is patching with glue over the affected area.
26. Rear cassette replacement
When some parts of the teeth become pointy, and the gears begin slipping, it's time to replace the cassette. Do this using a chain whip, a cassette lockring remover or a large adjustable crescent wrench.
Most bike mechanics recommend a replacement after 4,000 to 6,000 miles.

(Image Credit: Wikimedia Commons)
27. Quick pedal maintenance
Worn-out pedals can lead to issues, such as knee pain and accidental un-clipping. If you're experiencing float beyond what's normal, chances are the pedal body is worn out.
The telltale sign is a groove worn into the front.

28. Pedal cleat upkeep
The cleats wear out the quickest. Thankfully, they're also the cheapest part to replace. Most pedal cleats have wear sign marks that tell you when it's time for new ones.
29. Know when to take your bike to a professional
It's important that you know when to take your bike to a professional and when to do the bike repair yourself. This will save you time, money, and the risk of breaking something.
The rule of thumb is that if you don’t have the tools to do a bike repair properly, take it to a professional.
30. Invest in a bike storage shed
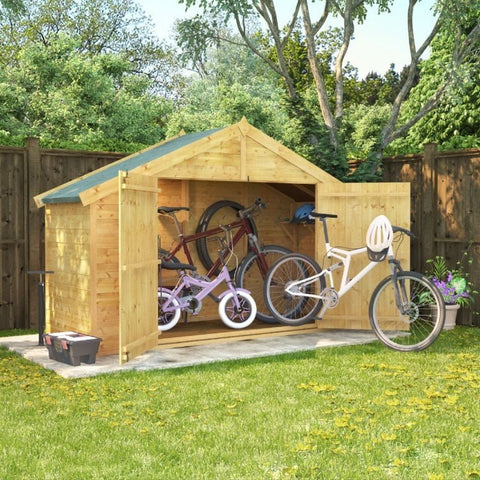
When it comes to bike storage ideas, you can never go wrong with sheds. Choose a heavy-duty unit for high-quality weather protection that's suitable for year-round use.
Top tip: If you have a steel bike, place a light coat of rust-proofing oil on it to prevent it from rusting.
Round-up
You need to stay on top of basic maintenance to prevent accidents and costly repairs for your bike. Bike maintenance doesn't have to be demanding and difficult, either.
You may not know every remedy for your bike needs, but you can gain enough wisdom along the way. And we hope our bike maintenance ideas help you maintain your bike and keep it rolling in pristine shape!


