How to Change the Inner Tube of a Bike
Punctures are an inevitable part of cycling. Being able to tackle this common issue can make a difference!
Knowing how to change bike inner tubes is an essential skill for all cycling levels. With this know-how, it can save you from being stranded on the side of the road with a flat tyre. But fret not if you haven’t acquired such a skill — we’ve got you covered!
In this guide, we’ll take you through the process of changing the tyre tube of your Bobbin bike. Keep reading to equip yourself with the skills needed to get back on your two wheels with minimal hassle!
Step 1: Gather the necessary tools and materials

To successfully change the inner tube of a bike, you’ll need the following:
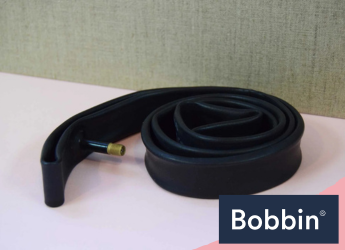
- Replacement inner tube: Ensure it matches your bike’s tyre size and valve type.
- Tyre levers: These handy tools help you safely remove the tyre from the rim without damaging the tube or rim.
- Pump: A reliable pump is essential for inflating the new tube to the recommended pressure.
- Wrench (if necessary): In some cases, you might need a wrench to loosen axle nuts or other components. This tool helps ease the process of fixing flats, e.g. removing wheels.
Using appropriate tools minimises the risk of damaging components. They also ensure your and your kids bike are ready to roll again with a well-functioning inner tube!
Step 2: Prepare the bike

Safety and proper stability are paramount during the replacement inner tube process. Secure your bike in a stable position to ensure your safety and the integrity of the bicycle. There are two common methods for achieving this:
- Bike stand: Using a dedicated bike stand provides a secure and convenient platform. Simply place the bike’s frame onto the stand, ensuring it’s snugly held in place. This method offers easy access to the wheel, minimising strain on your back. (An optimal solution for your Bobbin folding bike.)
- Flipping: Or carefully flip the bike upside down, resting it on the handlebars and seat. While this method may not be as ergonomic as a stand, it’s a practical option when a stand isn’t available.
Step 3: Remove the wheel

If your bike is equipped with brakes, release them before removing the wheel. To do this, locate the brake release lever or mechanism near the brake calliper. Gently squeeze the brake lever. While keeping it engaged, locate the release mechanism and disengage it. This action provides ample clearance for the tyre to be removed.
If your bike has axle nuts securing the wheel, use a wrench to loosen them carefully. Place the wrench on the nuts and turn counterclockwise to loosen. Keep a firm grip on the wheel as the nuts become loose to prevent any accidental dropping. Once sufficiently loosened, carefully slide the wheel out of the frame dropouts. Take care not to disturb the chain or derailleur.
You might want to read: How to Replace a Bike Chain?
Step 4: Deflate and remove the tyre
To begin, attach the pump nozzle securely to the valve. Press down to release air until the tyre is fully deflated.
Next, use tyre levers to ease one side of the tyre bead over the rim edge. Insert a lever between the tyre and rim, then pry the tyre upward, working along the circumference. Repeat this process in small increments until one side is free.
To prevent damage, ensure the lever’s spooned end is only engaging the tyre’s bead, not the inner tube. Avoid excessive force, which can pinch or puncture the tube. Work slowly to prevent scratching or denting the rim. You wouldn’t want to face issues while cycling from Land’s Ends to John O’Groats, would you?
Step 5: Remove the inner tube

(Image Credit: Wikimedia Commons)
With the tyre partially removed, gently reach inside. Then, carefully extract the punctured inner tube. Start near the valve and work your way around, taking care not to damage the tube further or pinch it against the rim.
Upon removal, take a moment to inspect the inner tube thoroughly. Run your fingers along the inside. Feel for any sharp objects like glass, thorns, or metal fragments that may have caused the hole. Doing so will help prevent future flats and ensure a successful repair.
Step 6: Insert the new inner tube

(Image Credit: Wikimedia Commons)
Lay the new inner tube flat, then slightly inflate it to give it shape. Place the valve through the valve hole on the rim. Tuck the rest of the tube inside the tire, making sure it’s centred and even.
As you carefully reposition the tyre onto the rim, ensure the inner tube remains inside. Also, it mustn’t get trapped between the tire and the rim. Work around the rim with your hands, gently pushing the tyre’s bead over the rim. Avoid using excessive force or tyre levers during this step to prevent damaging the new tube.
Step 7: Resemble the tyre and wheel
Starting opposite the valve, use your hands to push the tyre’s bead back onto the rim. Use your thumbs to guide the tyre into the rim’s well, working your way around. Ensure the inner tube remains inside and is not pinched between the tire and rim.
For the other side of your commuter bike, use tyre levers if needed. Insert one lever near the valve, then gently pry the tyre onto the rim in small sections. Use a second lever a few inches away, repeating the process until both sides are secure. This minimises the risk of pinching the tube and ensures a snug fit.
Step 8: Inflate the tyre
Attach the pump nozzle to the valve and start inflating the tyre. Monitor the pressure as you pump, pressing the tyre with your fingers. Inflate in small increments, adding air. Check until the tyre reaches the ideal pressure level.
Over-inflating can lead to blowouts and reduced traction. Consult your bike’s manual or refer to the manufacturer’s recommended pressure range.
Step 9: Reattach the wheel
Align the wheel by sliding it back into the bicycle frame’s dropouts. Make sure it sits centrally between the fork blades or rear stays.
If using axle nuts, hand-tighten them onto the axle threads. Then, use a wrench to tighten the nuts securely. Do so while holding the opposite end of the axle to prevent rotation.
If you release the brakes, reattach them by engaging the release mechanism. Also, guide the brake pads back onto the wheel’s rim. Test the brakes to ensure proper function before embarking on a family riding bikes.
Step 10: Test and final check

Finally, take your vintage style bike for a gentle test ride. This ensures the tire is secure and the inner tube is properly seated and inflated.
To wrap up, here’s a quick checklist:
- Secure bike: Ensure the bike is stable and properly positioned.
- Release brakes: If applicable, release and reattach brakes.
- Tube replacement: Followed each step carefully.
- Proper inflation: Inflate the tire to recommended pressure.
- Wheel alignment: Ensure the wheel is centred and secure.
Now, you’re ready for a safe and enjoyable ride! To save time, try fixing a bike puncture without removing the wheel. Also, keep a bike multitool handy in your kit or bike pannier.
What you should read next: What to Do if You Have a Cycling
Related Posts

Can You Take a Folding Bike on a Plane?
Yes, you can take a folding bike on an aeroplane. Normally, taking ...

Best Ways to Carry a Folding Bike
Folding bikes are designed to be lightweight and portable, and thei...

Adult Bike Without Gears - What Are the Options?
It’s a real bummer having so few options for bicycles for adults wi...


