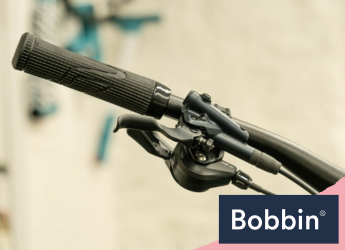
Adjustments: How to Adjust the Brakes, Handlebars, and Saddle on a Kids Bike
Ensuring your child’s safety and comfort while riding a bike is paramount. And it all begins with the proper adjustments. Kids grow quickly, and their kids' bikes need to grow with them.
This guide will explore three crucial bicycle tuning: brakes, handlebars, and the saddle. By the end of this article, you’ll have the knowledge and confidence to make these configurations.
Adjusting the Brakes

Brake adjustment is essential to ensuring a child’s safety while riding. Inadequately adjusted brakes can lead to:
- compromised control
- increased stopping distances
- accidents
Such risks are high for children, especially those new to biking. But these issues are nothing with properly adjusted brakes. Instead, this brake tweak can provide responsive stopping power. This allows your little rider to control their speed and stop when necessary.
Brake adjustment ensures that a child can enjoy pedalling with confidence. This can be true whether they’re riding bike with stabilisers or on bigger wheels like 26 inch bikes. Overall, this makes it imperative for parents to perform this maintenance task correctly.
Step-by-step brake adjustment
To get started, you’ll need a few basic tools: an Allen wrench, a screwdriver, and possibly pliers. Begin by checking the brake cable tension, making sure it’s neither too loose nor too tight. Next, focus on brake pad alignment, ensuring they contact the rim evenly. Finally, conduct thorough brake tests. This will verify that the brakes engage smoothly and stop the bike promptly. These adjustments will guarantee your child’s brakes perform optimally.
Adjusting the Handlebars

Properly aligned handlebars are the linchpin of control and comfort on your child's bike. Misalignment can lead to an uneasy experience, causing strain on a kid’s arms and shoulders. Additionally, they can impair steering precision, increasing the risk of accidents.
When handlebars are correctly aligned, they ensure both ergonomic comfort and enhanced control. This makes it easier for your young rider to navigate the twists and turns of their Hornet bike.
Step-by-step handlebar adjustment
Let’s get into the nitty-gritty of handlebar adjustment. You’ll need just a few tools: an Allen wrench and, if necessary, a torque wrench. Begin by loosening the handlebar clamp bolts. Doing so will allow you to reposition the handlebars to the desired angle. Ensure that the height of the handlebars matches your child’s size. Position them so your child can comfortably reach them without restrictions. Finally, if available, securely tighten the handlebar clamp bolts using a torque wrench. This final step will prevent any unwanted movement during rides.
To guarantee that the handlebars are straight and secure, check they’re in line with the front wheel. This ensures precise steering. Additionally, make it a habit to inspect the bolts for tightness periodically.
Top tip: In case of wheel removal and changing, use this guide on “How to Change a Bike Wheel”.
Adjusting the Saddle
Bike saddle position adjustment impacts both comfort and pedalling efficiency. An improperly adjusted saddle can lead to discomfort, even on balance bikes. It can also hinder pedalling efficiency, making it harder for them to enjoy longer rides. Ensuring the saddle is correctly adjusted not only prevents discomfort. This practice also promotes a balanced and efficient pedalling motion.
Step-by-step saddle adjustment guide
Here’s how to adjust the saddle effectively. Gather the tools you’ll need: an Allen wrench or a quick-release lever, depending on your bike’s saddle clamp type. Determine the proper sprung saddle height. This is generally achieved when your child’s leg is nearly fully extended but with a slight bend at the knee when the pedal is at its lowest point. Level the saddle so it’s parallel to the ground, and ensure it’s centred on the seatpost. Finally, tighten the saddle securely using an Allen wrench or a quick-release lever.
Getting the saddle height just right is a crucial detail often overlooked. When it’s properly adjusted, it prevents discomfort, such as sore knees or back pain. More importantly, it fosters proper pedalling, making each ride enjoyable and efficient.
Round-up
In the world of kids’ biking, the magic lies in the details. Thus, ensuring the brakes, handlebars, and saddle are correctly adjusted is crucial. Remember, safety and comfort go hand in hand. Here’s to countless safe and joyful rides ahead!
To further enhance their road safety, equip them with reliable childrens bike helmets. Also, consider attaching front cycle lights and bike bells on the handlebar.
Next on your reading list: How to Accessorise Your Child’s Bike


