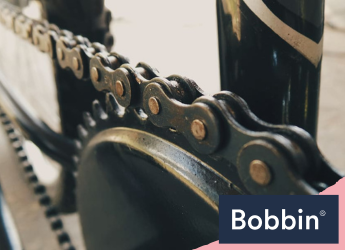
How to Replace a Bike Chain?
A smooth and efficient ride heavily relies on a well-maintained bicycle chain. Over time, it wears out due to regular use and exposure to the elements. This often affects your Bobbin bike’s overall performance.
In this blog, we’ll take you through the process of how to change a bike chain. Here, you will learn to tackle the following techniques:
- gathering the necessary tools
- measuring and removing the old chain
- installing the new chain with precision
- ensuring the correct tension
Read on and keep your wheels turning smoothly and effortlessly.
List of Necessary Tools

(Image Credit: Wikimedia Commons)
So, how to replace road bike chain? Generally, you’ll need a handful of essential spare parts and tools, such as:
- Chain breaker: For disassembling the old chain.
- Chain whip: For holding the cassette in place during removal.
- New chain: Make sure it matches the type and speed of your city bike’s drivetrain.
- Chain lubricant: Proper lubrication ensures optimal chain performance and longevity.
Others include a cassette lockring tool, a wrench for the crankset, and a pair of pliers. With these tools, you’ll be well-equipped to tackle the process confidently.
Learn How to Measure and Remove the Old Chain

A properly sized chain ensures smooth shifting and reduces the risk of derailment. An accurate measurement also helps avoid putting unnecessary strain on the drivetrain components.
To measure, begin by shifting the chain to the smallest chainring at the front and the smallest cog at the back. Pull the chain taut and align it with the bottom of the chainstay. Check the point where the chain meets the chainstay (reference point for measurement.) Count the number of complete links, excluding the half-link, to determine its length.
While measuring, inspect the chain for signs of wear, such as elongation, rust, or damaged links. If it shows significant wear or exhibits tight spots, replacement is necessary.
Once the measurement is complete, safely remove the old chain using a chain breaker tool. Place the breaker on the chain pin and turn it until the pin is partially pushed out. Carefully repeat the process on the other side until the chain is separated. Be cautious not to push the pin entirely out, as it will be needed later when installing the new ones.
Install the New Chain

This step requires attention to detail to ensure a smooth and trouble-free ride. Follow these step-by-step instructions:
- Begin by threading the new chain through the rear derailleur. Make sure it follows the same path as the old chain.
- Carefully pass the chain around the smallest cog at the back. Then, loop it through the front chainring.
- Ensure the chain is correctly seated on both the front chainring and rear cog. Avoid any twists or kinks.
- Pull the chain taut and reconnect it by inserting the chain pin into the outermost link. Align it with the corresponding inner link.
- Use a chain tool to push the chain pin back into place firmly. Ensure the pin is securely and evenly seated to prevent chain breakage.
- Double-check the alignment by cycling the pedals and shifting through all gears. Proper alignment ensures smooth gear transitions and reduces the risk of chain slippage.
This general guideline is suitable for both kids bikes and adult bikes.
Lubricating the new chain
Oiling the new chain significantly enhances its performance and prolongs its lifespan. Proper lubrication reduces wear between the chain links and the drivetrain components. It ensures smoother gear shifts and quieter operation. What’s more, it prevents rust and corrosion, especially in wet or humid conditions.
You may refer to our “How to Oil a Chain” guide to ensure even coating. Following these instructions will help maintain a well-lubricated chain, optimising your biking experience.
Inspect the chain for tension
Checking the chain tension is vital. For one, it impacts the bike’s shifting performance - a fold away bike is no exception. Proper tension ensures smooth and precise gear changes, preventing chain skipping. Additionally, it reduces wear on the drivetrain components, extending their life.
To assess chain tension, shift to the smallest chainring and the smallest cog. With the chain on the top of the pulley wheel in the rear derailleur, there should be a slight amount of vertical movement possible. When properly adjusted, the chain should not sag excessively or feel overly tight. Finding the right balance ensures optimal power transfer and a seamless ride.
Tips for Ensuring Proper Chain Tension

(Image Credit: Wallpaper Flare)
Ensuring correct bike chain tension is vital for optimal performance. Start by checking the manufacturer’s specifications for the proper tension range. This is often indicated by the distance the chain can be depressed.
To adjust the tension using the rear derailleur, shift to the largest chainring and cog. Loosen the rear derailleur’s mounting bolt slightly. Use the barrel adjuster to fine-tune the tension.
Troubleshoot issues like chain skipping by ensuring the derailleur hanger is aligned. Plus, the chain and cassette must be clean. If the chain feels too tight, release tension slightly.
Regularly inspect and maintain the chain. Doing so helps improve your riding experience, especially during leisure cycling holidays!
FAQs
Why do bike chains need to be replaced?
Road bike chains wear out over time due to constant use and exposure to dirt and moisture. A worn-out chain negatively impacts shifting performance. Overlooked, this can lead to excessive wear on other bike accessories like chainrings. Regular replacement ensures smoother rides and prolongs the life of your bike accessories.
Do all bike chains fit all bikes?
Not all bike chains are universal. The type and speed of the chain must match the bike’s drivetrain. Bikes with different speeds, such as single-speed, 8-speed, 10-speed, etc., require specific chains. Installing the correct chain ensures compatibility and optimum performance.
How to check if the bike chain needs replacing?
Check the chain for signs of wear, such as elongation, rust, or stiff links. Use a chain checker tool to measure the chain’s stretch. If it surpasses the recommended limit, it’s time for a replacement.
Use our “How to Perform a Bike Safety Test” guide for detailed instructions. For added peace of mind, our bike multitool comes in handy for on-the-go emergency repairs. Enhance your safety with a Bobbin helmet and a dependable bike bell for an improved and secure ride.
Related Posts

Can You Take a Folding Bike on a Plane?
Yes, you can take a folding bike on an aeroplane. Normally, taking ...

Best Ways to Carry a Folding Bike
Folding bikes are designed to be lightweight and portable, and thei...

Adult Bike Without Gears - What Are the Options?
It’s a real bummer having so few options for bicycles for adults wi...


