How to Fix a Flat Bicycle Tire
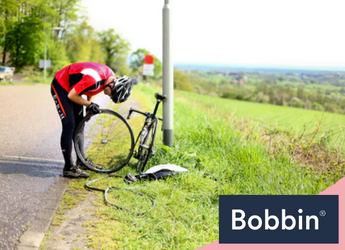
Flat tyres on a bicycle are a common issue for cyclists. But don’t fret over deflated wheels; it’s a natural part of cycling. With the right tools, a bit of practice, and some basic knowledge, you'll be back on the road in no time. This guide will walk you through the process and discuss common causes of flat tyres.
How to Fix a Punctured Bicycle Tyre?

Thinking ahead and taking some time to learn how to change a flat helps. The hassle of fixing it may be annoying, but not the end of your ride.
Here’s a step-by-step guide to save you the trouble:
Prepare the tools

Put together the basic materials required to fix your flat effectively. The things you need depend on whether you’re riding tubeless or tubed.
For tubed tyres, you’ll need the following:
- Mini pump, even better with a hose;
- At least two CO2 cartridges and inner tubes;
- Valve extension, particularly if you’re riding aero rims;
- Tyre levers;
- Tube patch kit.
For tubeless, prepare the following:
- A mini pump with a hose;
- At least two CO2 cartridges and inner tubes;
- Tire levers;
- Tubeless tyre repair kit.
Step 1: Remove the wheel from the bike

If you have tubeless tyres and the necessary repair kit, you can skip this step. Otherwise, begin by removing the wheel.
Check for damage and determine if it’s a simple puncture or not. If it’s the latter, where plugging won’t suffice, flip the bike upside down to detach the wheels from the frame.
Removing the rear wheel is more challenging than the front, so take your time. Start by releasing the brakes. Squeeze the brake arms together to ease the tension on the cable.
If the brake has a quick-release lever, open it. Next, release the wheel from the frame. If using a quick-release axle, open and hold the lever while unscrewing the nut on the opposite side. Use a wrench to loosen the bolt.
Then, remove the rear wheel. Shift your chain onto the smallest cog of the rear cassette. If you have rim brakes, open them to ensure the tyre doesn’t get stuck during removal. For disc brakes, there’s no need to release them.
Pull open the lever and spin it to loosen it. You may also need to unscrew the nut on the opposite side. Push the rear derailleur back so the chain lifts away from the cog. Finally, remove the wheel from the dropouts on the bike frame with your other hand.
Tip: Practise taking the wheel on and off as often as possible. The more you do it, the easier it will be in an actual situation.
Step 2: Remove the tubes
You need to deflate your bike tyre completely, and you can do this in one of two ways, depending on the valve:
- For a wider Schrader valve, press down on the small pin in the centre of the tyre valve.
- For a thinner Presta valve, remove the plastic dust cap first. Then, turn the small valve at the top counterclockwise and press down to release air.
Next, unseat the tyre bead, located at the edge of the tyre under the rim. Do this by pushing the bead edge toward the centre of the rim and working your way around the rim.
Alternatively, use a tyre lever. To avoid damage, start on the section opposite the valve. Use the longer end of one tyre lever to pry the bead up and over the rim edge. Once part of the tyre bead is free, remove the rest with your fingers.
Then, begin detaching the inflatable tube from beneath the tyre. Pull the valve stem out through the rim first, and the rest should slide out easily when pulled.
Step 3: Determine the cause of flat

Inspect the tyres and tube for punctures, cuts, or tears. Start with the tyre, examining the outside and then the inside. Using your thumb and index finger, check the outside tread and its interior. If you find something, inspect the tube at approximately the same location to see if there’s any damage.
Spotting damage on the tube can be a bit tricky, but inflating it can help. Feel for escaping air or listen for a hiss. Alternatively, submerge it in a bucket of water and look for bubbles. If the valve system or base is cut, cracked, or severely worn, it may leak. In that case, the entire tube will need to be replaced.
When inspecting the rim, look for protruding spoke ends inside or areas where the tube may have been pinched.
Tip: Add a pair of tweezers to your bike repair kit to remove small items from your tyre or tube.
Step 4: Patch the problem (if necessary)

If you prefer to save a few pennies or want to be resourceful, patch the tubes. Invest in a patch kit, as it comes with everything you need.
Start by cleaning the damaged area, then roughen the surface using emery cloth or sandpaper. Next, apply the patch; it can be glueless or require glue. Peel off the backing, place it over the hole, and press with firm pressure.
If glue is required, add a thin layer of paste to the tube and the patch. Once the sticky substance has reached a tacky consistency, firmly place the patch.
Note: Some flats are simply too severe to patch. In such cases, you’ll need to skip this step and install a new tube.
Step 5: Install new/patched tube
To reinstall the tube, use a pump to inflate it just enough to maintain its shape. This makes installation easier and reduces the risk of pinch flats. Start with the valve system. Place the tube on the rim and insert the stem straight through the valve hole.
Carefully work the tyre back onto the rim by rolling the bead away using your hands. When you reach the valve stem, tuck the sides of the tyre bead low into the rim. Then, push up on the stem to position the tube inside the tyre. Be extra careful to ensure the tyre bead isn’t pinching the tube.
Step 6: Inflate the tire

You can use either a CO2 cartridge, a mini pump, or both. CO2 cartridges are best for inflating to higher pressures. A mini pump, in contrast, makes a smart backup method and an easy alternative. A pump with a hose is recommended, as it allows for better leverage and higher pressures.
Once you’ve inflated to your desired PSI, double and triple-check the bead to ensure it sits correctly on the rim. If everything is in its proper place, you may reattach your wheel.
Tip: It’s also a good idea to practice tyre inflation at home using a tyre inflator to avoid blowing out your tube.
Step 7: Reattach the wheel

To attach the front wheel, align the fork dropouts with the wheel’s axle, lowering the fork onto the axle. Push down on the handlebar to ensure proper axle placement.
Hold the quick-release lever in place as you tighten the bolt. If the lever closes too easily, open it and tighten the bolt more, but don’t overdo it. If your flat occurred on the rear wheel, position the chain on the smallest cog of the cassette. Ensure the frame dropouts align with the axle.
Push the wheel back into the frame, then pull the derailleur down and back to prevent it from getting in the way. Once the wheel is properly replaced, close the quick release (and rim brakes if applied).
You can also insert the thru-axle into the frame and hub and thread it shut. The final test is to lift the rear wheel and spin the cranks. If it runs smoothly, you’re good to go!
Round-up
Experiencing a flat tyre in the middle of your expedition is the last thing you want to happen. To keep moving forward, you must ensure your wheels are always in good shape. But this needn’t be a concern now that you already know how to handle it!
Should you have any questions, feel free to contact us. Next on your reading list: How to Fix a Bike Puncture without Removing the Wheel


