How to Fix a Bike Puncture without Removing the Wheel
Oh, the frustration of encountering a sudden puncture during an enjoyable bike ride! The inconvenience is having to remove your Bobbin bike’s wheel, locate the function, and patch it. But what if there was a quicker and more efficient way to get back on the road without all that hassle?
In this guide, we will unveil a nifty trick: bike tyre puncture repair without removing the wheel! By following these simple steps, you can save valuable time and energy. With less tinkering, you can spend more time pedalling. Ready?
Basic Steps of Repairing a Puncture without Removing the Wheel

When a wheel puncture repair strikes, there’s no need to fret about the hassle of wheel removal. In this section, we’ll uncover these steps: preparing, deflating, patching, and inflating. Let’s roll!
1. Preparing the bike for repairs

(Image Credit: Wikimedia Commons)
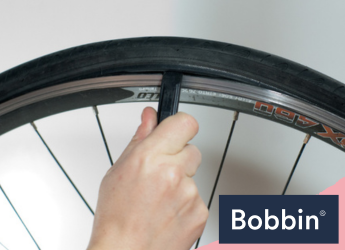
Before diving into the process of fixing a flat tire, gather the essential spare parts and tools:
- puncture repair kit
- tire levers
- hand pump
Once equipped, find a safe and well-lit area to work on your commuter bicycle. Make sure there’s ample visibility for a precise repair. Next, position the bike, granting easy access to the punctured area for a smooth process. As you begin, prioritise safety by wearing gloves to shield your hands from debris.
2. Deflating the tyre
When deflating the tyre, proceed with caution to prevent damage to the inner tube. Release the air slowly and steadily, allowing for controlled deflation. To speed up the process, remove the valve core, enabling a quicker air release.
As the tyre deflates, gently squeeze it to ensure an even distribution of air release. These measures will safeguard the tube from necessary stress.
3. Examining and patching the puncture
Before proceeding with the actual repair, thoroughly inspect the tyre. Check for any foreign objects lodged in the tread or sidewall. If overlooked and not removed, these can lead to recurring punctures.
To identify leaks, use a mixture of soapy water and apply it to the tire surface. Watch for bubbles that indicate escaping air. Once the puncture is located, clean the area to ensure optimal adhesion for the patch. Use a buffing tool from your repair kit to roughen the surface around the hole. Remove any dirt or debris using a damp cloth.
Then, apply a thin layer of adhesive and wait a few seconds for it to become tacky. Carefully place the patch over the hole, pressing firmly to secure it in place. Smooth out any air bubbles, and let it dry for the recommended time.
4. Inflating the tyre
Inflating the tyre gradually is vital to avoid overstretching the newly applied patch. Rapid inflation can cause the patch to shift or weaken, leading to potential leaks. For better control, opt for a hand pump, which allows you to monitor the pressure more precisely.
The recommended tire pressure varies based on the type of kids bike or adult bike and tyre you have. Take a 24” hybrid bike wheelset, for instance. The recommended tyre pressure falls in the range of 40 to 60 psi.
Top tip: Always consult the tire sidewall or your bike manufacturer’s guidelines. This will help you find the optimal pressure for your specific bike and tire combination.
Make Sure the Tyre is Securely Fixed

(Image Credit: Wikimedia Commons)
Double-checking the bike tyre puncture repair job guarantees a reliable fix. What’s more, this habit ensures to avoid any potential mishaps while riding.
After applying the patch, inspect the patched area to ensure no leaks or weak spots. One effective way to perform a simple leak test is submerging the patched section in water. Look for any bubbles escaping from the patch, indicating air leakage. If bubbles appear, reapply the patch or address any issues promptly.
As you reinflate the tire, be attentive to any air hissing sounds. This could indicate air escaping from an imperfect seal. If you hear such sounds, stop inflating and reevaluate the patch before proceeding. Taking the time to conduct these checks guarantees a secure repair.
Replace the Tyre if Necessary
Before diving into the inner tube repair, it’s essential to assess the condition of your tires. If your tyres are worn, damaged, or have multiple punctures, a repair might be futile. In such cases, opt for a tyre replacement for a safer and smoother ride.
When choosing a new tyre, consider factors like tread pattern and durability. The tread pattern influences traction and performance on different terrains. For urban or casual riding, slick or semi-slick tyres provide low rolling resistance. Meanwhile, knobby ones excel on off-road trails.
Prioritise durability to ensure your tires withstand various conditions and last longer. Reinforced sidewalls and puncture-resistant layers can enhance tire longevity. Remember, a well-maintained tyre is a key component of a successful bike ride!
Next, discover how to optimise your rides with these road bike essential accessories. When it comes to your safety, you can never go wrong with the reliable protection of a Bobbin helmet. Paired with bike lights and a ringer bell, these will provide you with added visibility.


