How to Change a Bike Wheel
Removing and reinstalling a pair of wheels is a part of basic bike maintenance. But besides the upkeep, you may find yourself needing to pack your mountain bike for a trip and fit it in the car trunk. Or you need to take off the rear wheel to fix a flat tire, unfortunately.
Whatever your reasons are, you can remove them without affecting the bike chain. And if you do it well, you won’t have to worry about the greasy drivetrain either.
This post will show you how to change a bike wheel in an effective manner.
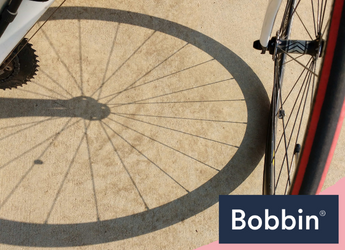
Road Bike Wheel Components

(Image Credit: Wikimedia Commons)
When talking about wheels, these are the round things minus the tubular tires. At a bare minimum, the outer edge holds the actual tire, known as the wheel rim.
A bicycle wheel consists of four main components. It’s worth knowing a little about each before disassembling them.
- Rim. The wheel rim sits on the outside and has two main functions: 1.) holds the bike tyre, 2.) provides a braking surface for the rim brakes. Also known as the outer edge. The width will define how wide of a tire you can put in and could have a significant impact on the rider’s comfort.
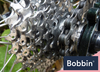
- Hub. The hub sits at the centre (front and rear), providing the axis of rotation. It’s connected to the rim via the spokes and through which the axle is fitted. This enables the wheel to spin on two sets of bearings freely.
- Spokes. These are the materials that connect the rim and hub. They transfer the loads between the two, which are caused by the rider and the bike’s weight.
- Nipples. In biking terms, these are the small nuts that secure the end of each spoke to the outer edge.
All other parts are dependent on the wheel frame type. This includes disc brakes and tubeless or tubular tires. You may struggle to remove the entire wheel if you don’t know all these.
How to Change a Bike Wheel

Besides accidental tire deflation, every ride takes a toll on the wheel. This ongoing cycle also contributes to wear and tear. Don’t wait for the spoke and/or wheel nut to break.
Here’s how you can remove and reinstall your wheel like a pro:
1. Position the bike
First, you have to tackle the rear wheel removal. If your bike has a rim or cantilever brakes, release the cable tension.
Take a 15mm wrench in a counterclockwise direction to the axle nuts to loosen them. Release the brake calliper to remove the pressure on the outer edge. This spreads the brake pads, allowing more room for the rear tire to pass through.
It’s best to do this with your bike in a repair stand. Alternatively, turn the bike upside down - or hold it up with one hand, preferably with a buddy’s help.
Say you have clutched derailleurs on your mountain bike with 1x drivetrains. Disengage the clutch by doing the following steps:
- Shimano derailleurs. Turn the clutch lever to the off position.
- SRAM derailleurs. Push the derailleur cage forward. Then push the cage lock button, holding the cage in a forward, loose position.
2. Undo the rear axle
For the quick release axle, flip the lever into the open position. If it’s right, use a tire lever to pry it loose. Holding the lever still, lose the bolt on the other side of the axle, but do not remove it completely.
For thru-axles, open the lever and turn it counterclockwise. This will unthread the axle and remove it from the hub. Use an Allen wrench for easy removal.
3. Remove the wheel
When the quick release axle (or thru) is open, you’re ready to remove the wheel. To remove it, lift the bike by the seat, and the wheel will drop right out at this point. Do this without dislodging the callipers if you have rim brakes. If you have disc ones, be careful with rotors.
Now, if the rear wheel doesn’t drop out easily, move the derailleur out of the way. Rotate it back so it doesn’t hold the wheel in the dropouts.
Swing the derailleur back so the upper pulley wheel no longer blocks the cassette. The wheel should easily come down and out of the dropouts.
Top tip: If the chain gets in the way, push the derailleur cage down and forward. That way, you never touch the chain and get grease on your hands.
4. For the back wheel
Removing the back wheel is almost the same as the steps for the rear. Begin with the rear brakes and follow the steps:
- Pinch the brake calliper and release slowly.
- Loosen the axle nuts with a 15mm wrench. Allow for space to slide out of the dropouts.
- Remove the derailleur from the line of the cogs. Then, gently pull the wheel downward away from the bike frame.
5. Put the wheel back on
Reinstalling a pair of wheels is the same as removal, except it’s in reverse order. Place the wheel back in the frame, close the quick release to the wheel, and close the brake calipers.
The axles should be in line with the dropouts, and the chain should go around the cog system again. To reattach the brake system, compress the callipers and reattach the line. Tighten them using a 15mm wrench.
If you have disc brakes, pay attention to the rotor’s alignment. Put the wheel in a straight and gently fitting rotor between the brake pads into the calliper.
Top tip: Spin your wheel to make sure the pads aren’t rubbing the rim or the rotor. If it doesn’t spin, it could be crooked in the fork’s dropout. Flip your bike back over, loosen the quick release axle, push down on the wheel, and then tighten the axle again.
Bonus: Bike Wheel Maintenance

- Change brake pads. Worn brake pads affect your riding experience and could damage the rim. Use a small Allen key to change them with a new set.
- Clean the bearings. The hub bearings may need to be cleaned and repacked with grease, depending on the quality. Plus, how much you ride and the conditions you ride in.
- Rim inspection. For every brake, the outer edge wears. This friction thins the rim over time. If left unattended could weaken the wheel’s structure. To avoid this, regularly inspect the rim and keep an eye on the wear indicators. These could be a small hole or groove in the rim.
- True wheel upkeep. ‘True’ refers to the wheel’s tracking in a straight line without deviation. If your wheel is out of true, it may rub on your brakes or affect the bike’s handling. Adjust the spoke tension to achieve a true wheel.
Round-up
It’s important to know how to get an entire wheel on and off of your bike. This applies to whether you’re doing basic maintenance, fixing a flat or trying to fit your ride onto a rack.
We recommend practising these steps a few times, and you’ll be taking your wheels on and off like a pro mechanic! Now that you know how to change a bike wheel, discover more bike maintenance tips.Related Posts

Cycling in the Rain: Key Tips for a Safe Ride
Cycling in the rain on Bobbin bikes brings a unique joy, but it req...
What Is a Bike Sprocket?
Every component in your Bobbin bike plays a role in the smooth oper...

Most Frequent Cycling Injuries and How to Treat Them
Cycling is a thrilling blend of freedom and fitness. While the bene...


